Kindly review the following guidelines to determine if your sample is suitable for testing and how to prepare it. Please note that not all samples can be accepted for characterization.
1. We do not accept liquid or gas samples; only solid samples are eligible.
2. Ensure that your sample is completely dried before submission. For information on different laboratory drying methods, please refer to the list below.
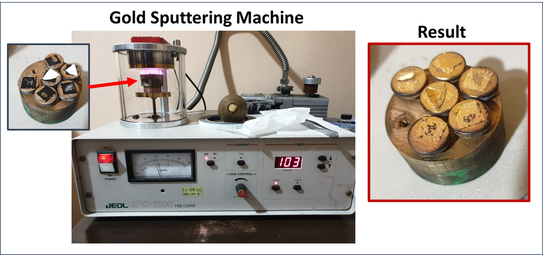
3. Additionally, consider the electrical conductivity of your sample. If your sample is non-conductive, it must be sputtered with gold before testing (see figure below). Hence, you need to pay an additional fee for the gold sputtering procedures in our laboratory. Conductive samples are ready for SEM and EDX analysis. However, most samples are typically non-conductive. Metals are the most obvious conductive samples.
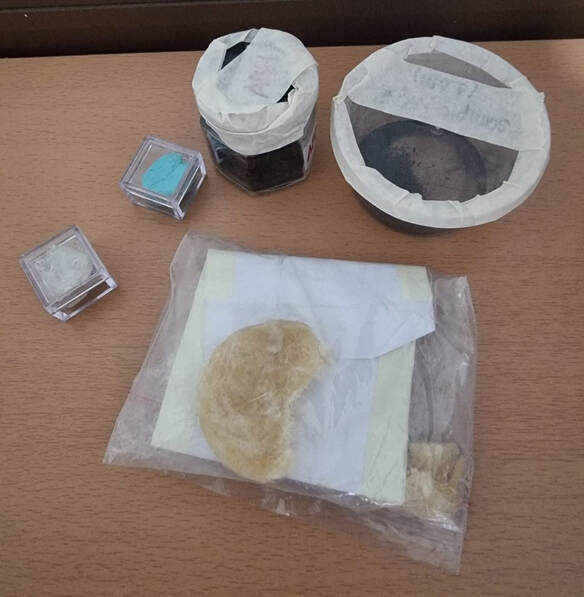
4. Put your samples on a sealed small plastic container or zip lock.
(See the photo below to see how others have securely packaged their samples for shipping)
5. The ideal sample's size is 1 inch squared (in area) and the ideal sample's mass is 3g.
1. We do not accept liquid or gas samples; only solid samples are eligible.
2. Ensure that your sample is completely dried before submission. For information on different laboratory drying methods, please refer to the list below.
3. Additionally, consider the electrical conductivity of your sample. If your sample is non-conductive, it must be sputtered with gold before testing (see figure below). Hence, you need to pay an additional fee for the gold sputtering procedures in our laboratory. Conductive samples are ready for SEM and EDX analysis. However, most samples are typically non-conductive. Metals are the most obvious conductive samples.
4. Put your samples on a sealed small plastic container or zip lock.
(See the photo below to see how others have securely packaged their samples for shipping)
5. The ideal sample's size is 1 inch squared (in area) and the ideal sample's mass is 3g.
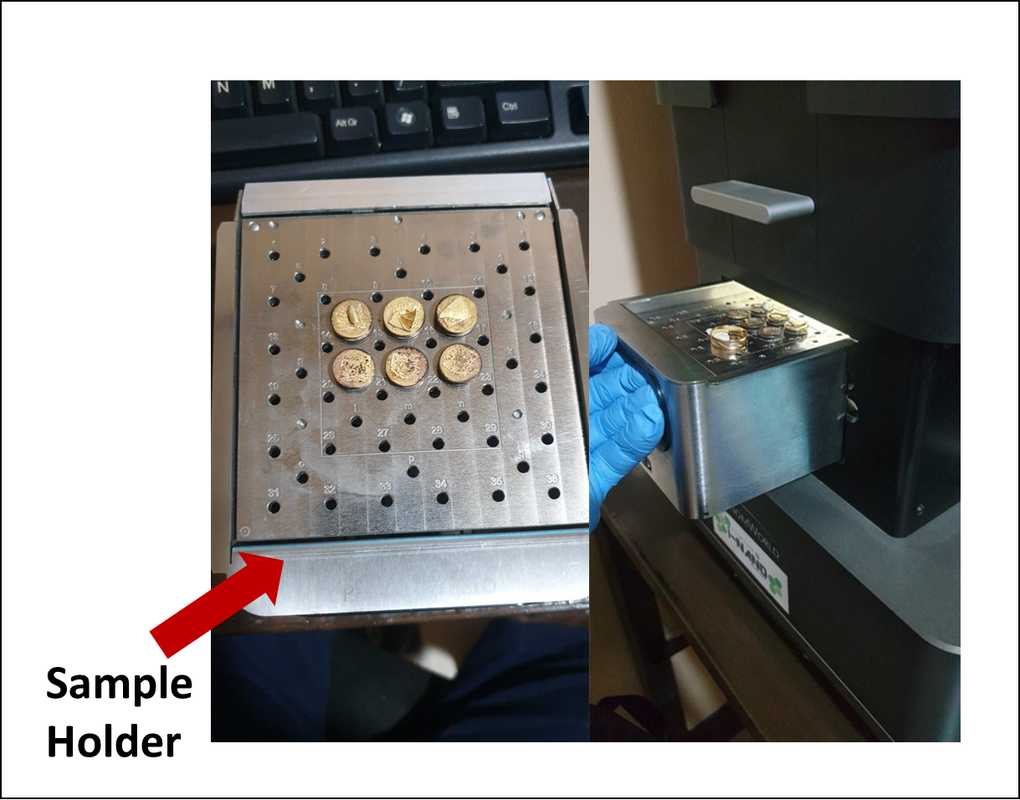
Kindly see the photos below on how we are going to prepare your samples prior to testing. Take note of the small size of the sample holder, which provides an indication of the amount of sample required for testing. To secure your samples, a carbon tape will be applied to the sample holder, and your samples will be attached to the carbon tape.
Kindly see the photos below on how we are going to prepare your samples prior to testing. Take note of the small size of the sample holder, which provides an indication of the amount of sample required for testing. To secure your samples, a carbon tape will be applied to the sample holder, and your samples will be attached to the carbon tape.

Laboratory drying methods:
1. Air Drying: This is the simplest method, where samples are left to dry at room temperature in a well-ventilated area. It's suitable for samples that are not sensitive to heat or moisture.
2. Oven Drying: Samples are placed in an oven at a controlled temperature to remove moisture. This method is faster than air drying and is suitable for heat-resistant samples.
3. Vacuum Oven Drying: Similar to oven drying but done under vacuum to lower the boiling point of water, which speeds up the drying process. It's suitable for heat-sensitive samples.
4. Freeze Drying (Lyophilization): This involves freezing the sample and then removing the ice by sublimation under vacuum, which preserves the sample's structure and properties. It's suitable for heat-sensitive samples and is commonly used for biological samples and pharmaceuticals.
5. Spray Drying: A solution or suspension is sprayed into a hot chamber, where the solvent evaporates, leaving behind dry particles. It's suitable for heat-sensitive samples and is commonly used in food and pharmaceutical industries.
6. Microwave Drying: Samples are dried using microwave radiation, which heats the water molecules in the sample. It's faster than conventional methods and is suitable for heat-resistant samples.
6. Desiccant Drying: Samples are placed in a desiccant, such as silica gel or calcium chloride, which absorbs moisture from the sample. It's suitable for small, heat-sensitive samples.
